Initial Setup
After installation, the setup process consists of two phases:
- Setup Wizard — Create your admin account (unauthenticated, time-limited)
- Onboarding — Configure organization, environment, and stack sources (authenticated, guided)
Phase 1: Setup Wizard
Section titled “Phase 1: Setup Wizard”The setup wizard starts automatically on first access to the web interface. It has a single step: creating the admin account.
Create Admin Account
Section titled “Create Admin Account”Enter your administrator credentials:
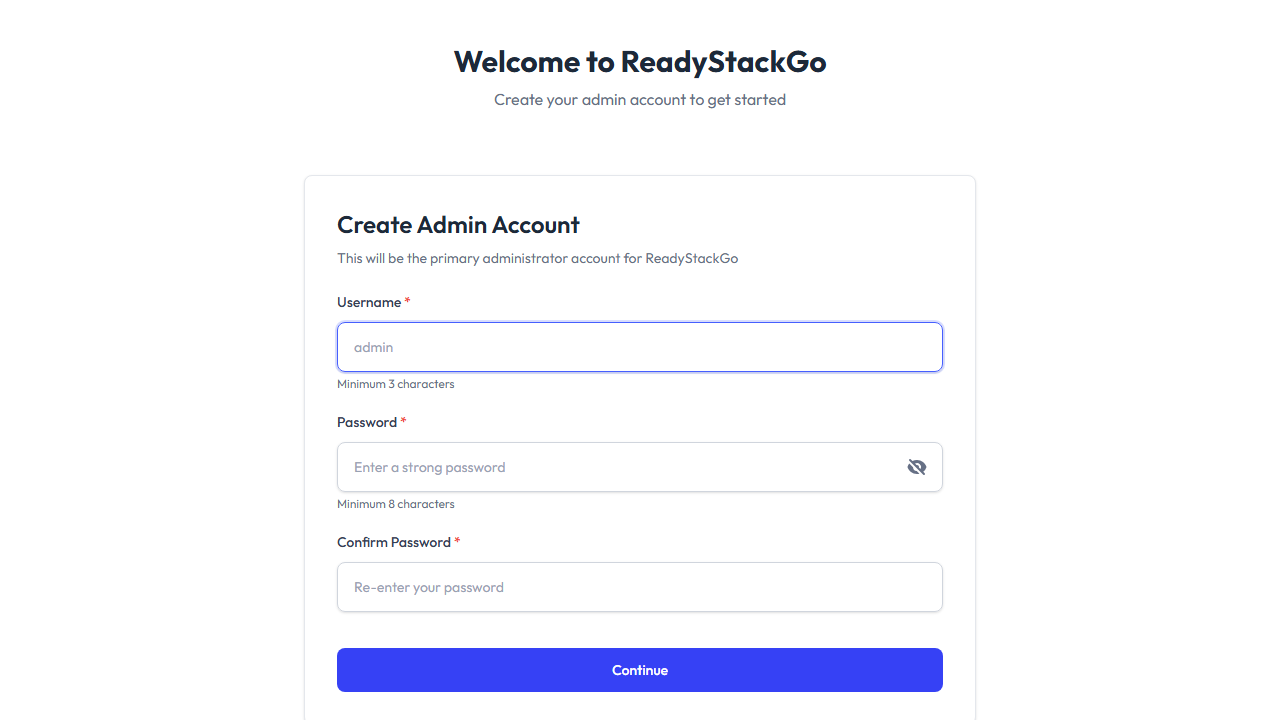
| Field | Requirement |
|---|---|
| Username | Minimum 3 characters |
| Password | Minimum 8 characters |
| Confirm Password | Must match the password |
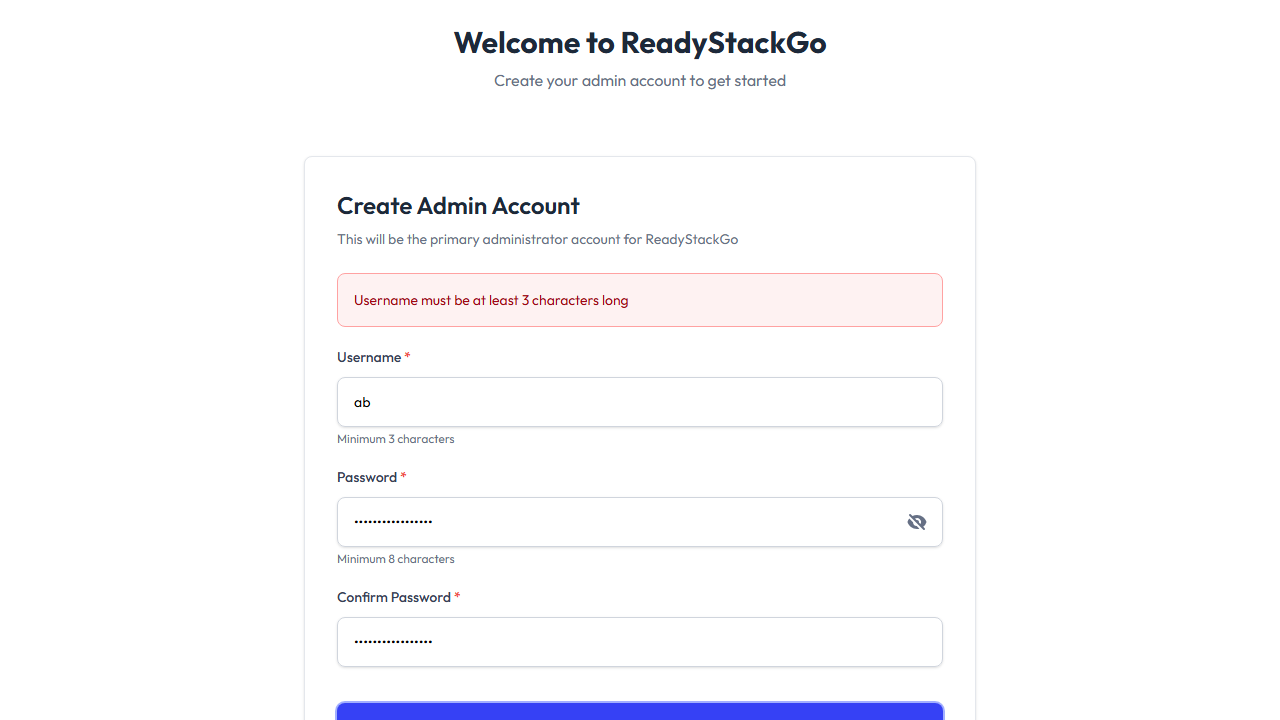
The form validates your input before submission:
What Happens After Submission
Section titled “What Happens After Submission”When you click “Continue”:
- The admin account is created
- You are automatically logged in (no separate login step)
- The wizard marks itself as complete
- You are automatically redirected to the Onboarding
Phase 2: Onboarding
Section titled “Phase 2: Onboarding”After the wizard, the guided onboarding starts automatically. It walks you through the initial configuration of your ReadyStackGo instance in three steps.
Step 1: Create Organization
Section titled “Step 1: Create Organization”The organization is the top-level identity of your ReadyStackGo instance. All environments, stacks, and settings belong to it. This step is required — there is no “Skip” button.

| Field | Requirement |
|---|---|
| Organization Name | Minimum 2 characters |
Enter a name and click “Continue”.
Step 2: Add Docker Environment
Section titled “Step 2: Add Docker Environment”In this step, you connect ReadyStackGo to a Docker daemon. The fields are pre-filled with sensible defaults:
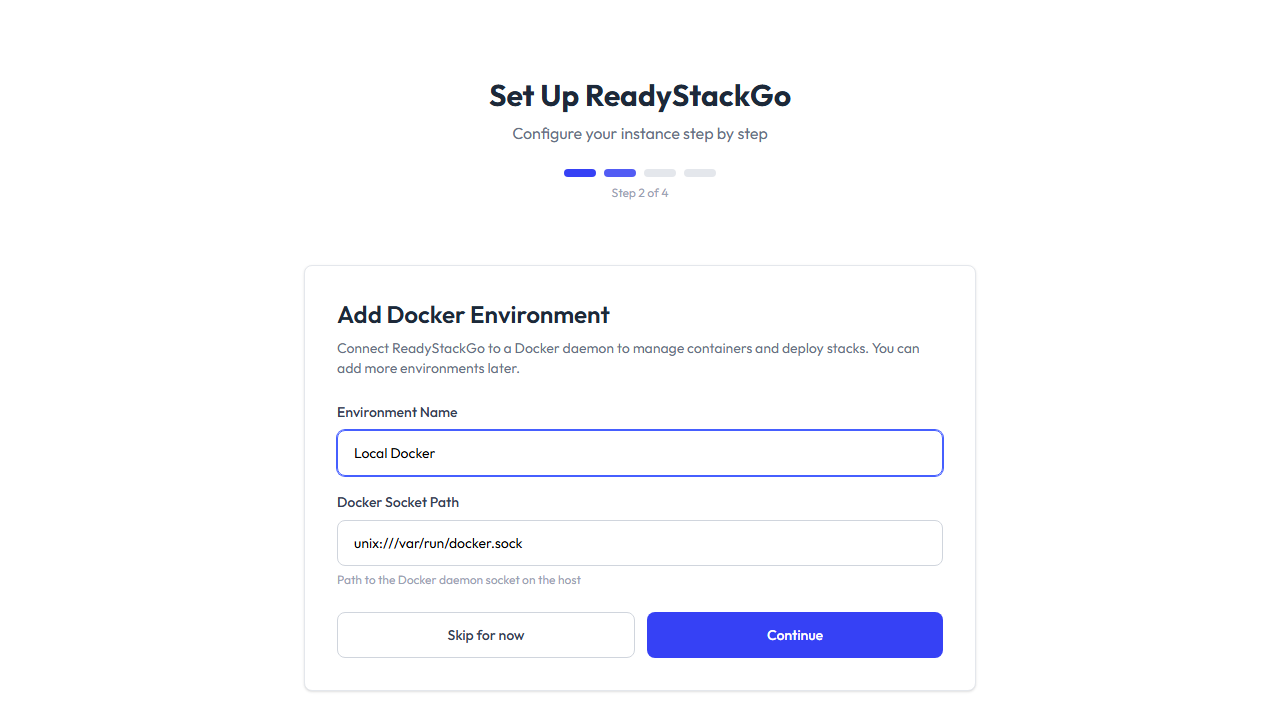
| Field | Default Value | Description |
|---|---|---|
| Environment Name | Local Docker | A display name for this environment |
| Docker Socket Path | unix:///var/run/docker.sock | Path to the Docker daemon socket on the host |
You have two options:
- “Continue” — Creates the environment with the specified values
- “Skip for now” — Skips this step (you can add environments later in Settings)
Step 3: Select Stack Sources
Section titled “Step 3: Select Stack Sources”Stack sources are repositories containing pre-configured stack definitions that you can deploy directly. ReadyStackGo shows you a curated list of available sources:
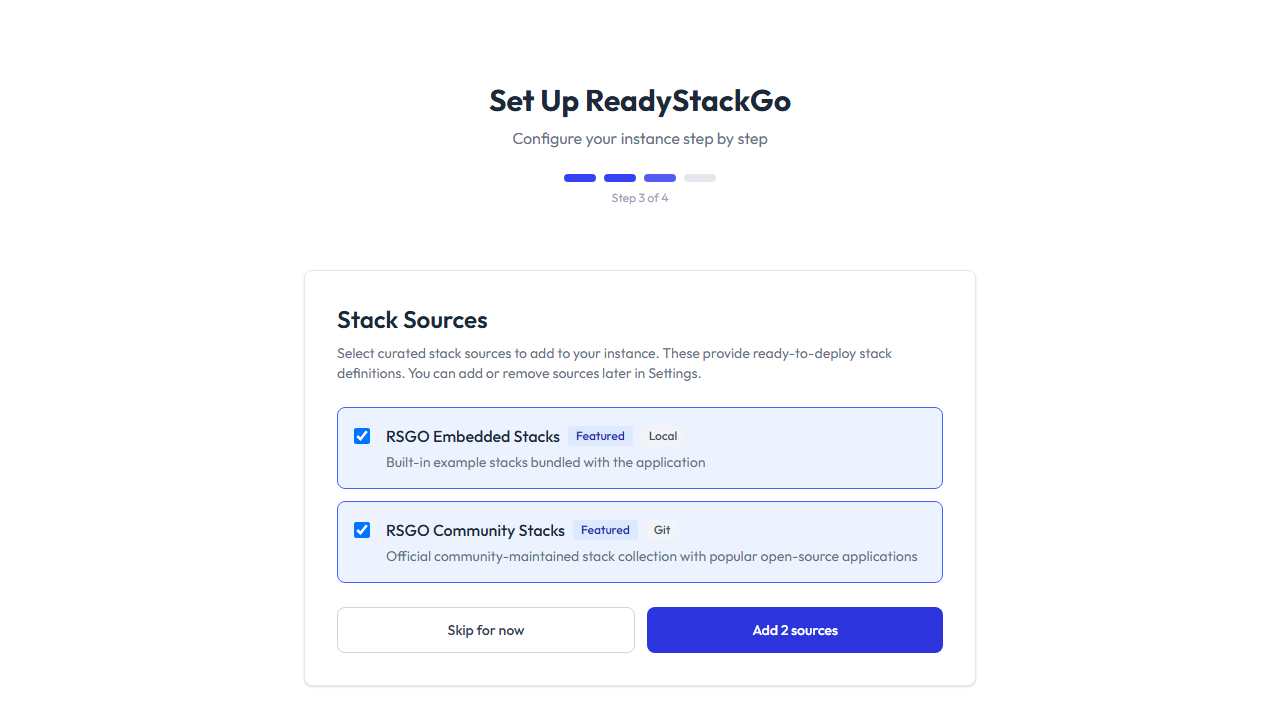
- Recommended sources (Featured) are pre-selected automatically
- You can select and deselect sources as needed
- Click “Add sources” to add the selected sources
- Or click “Skip for now” to skip this step
Step 4: Summary
Section titled “Step 4: Summary”After completing the steps, the onboarding shows a summary of all configured (and skipped) items:
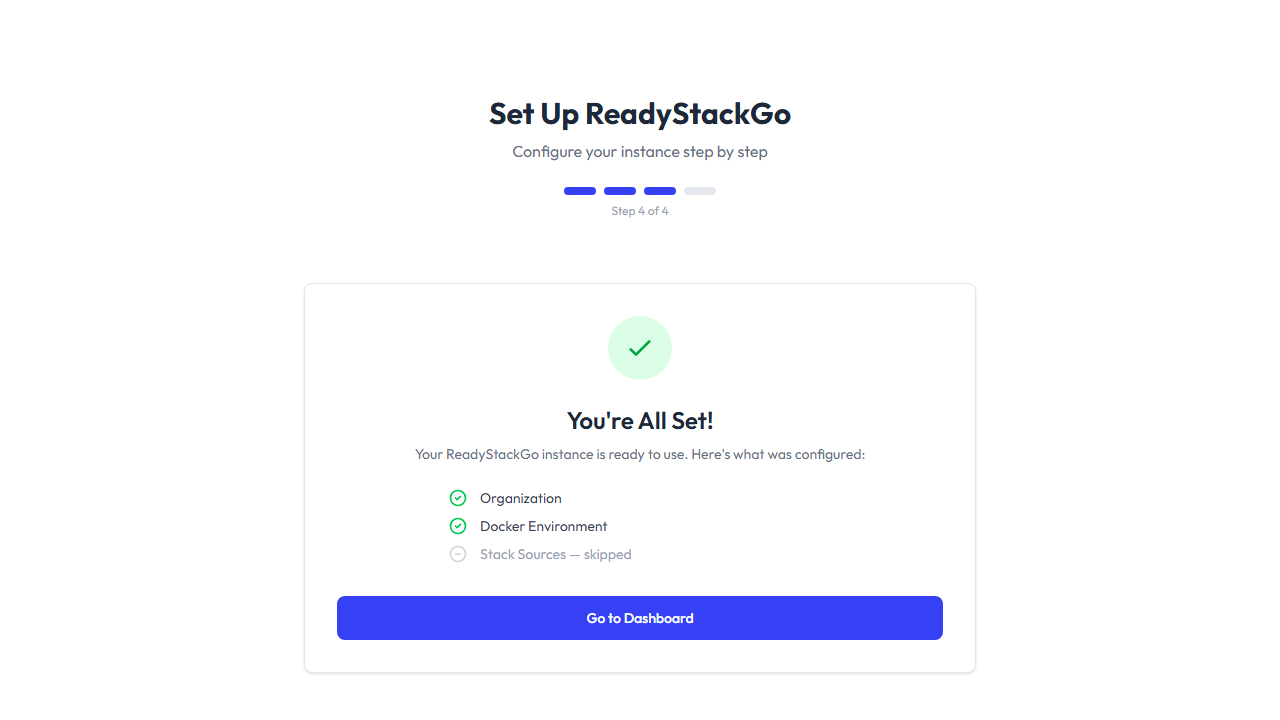
Click “Go to Dashboard” to proceed to the dashboard.
After Setup
Section titled “After Setup”After completing the onboarding, you are redirected to the Dashboard:
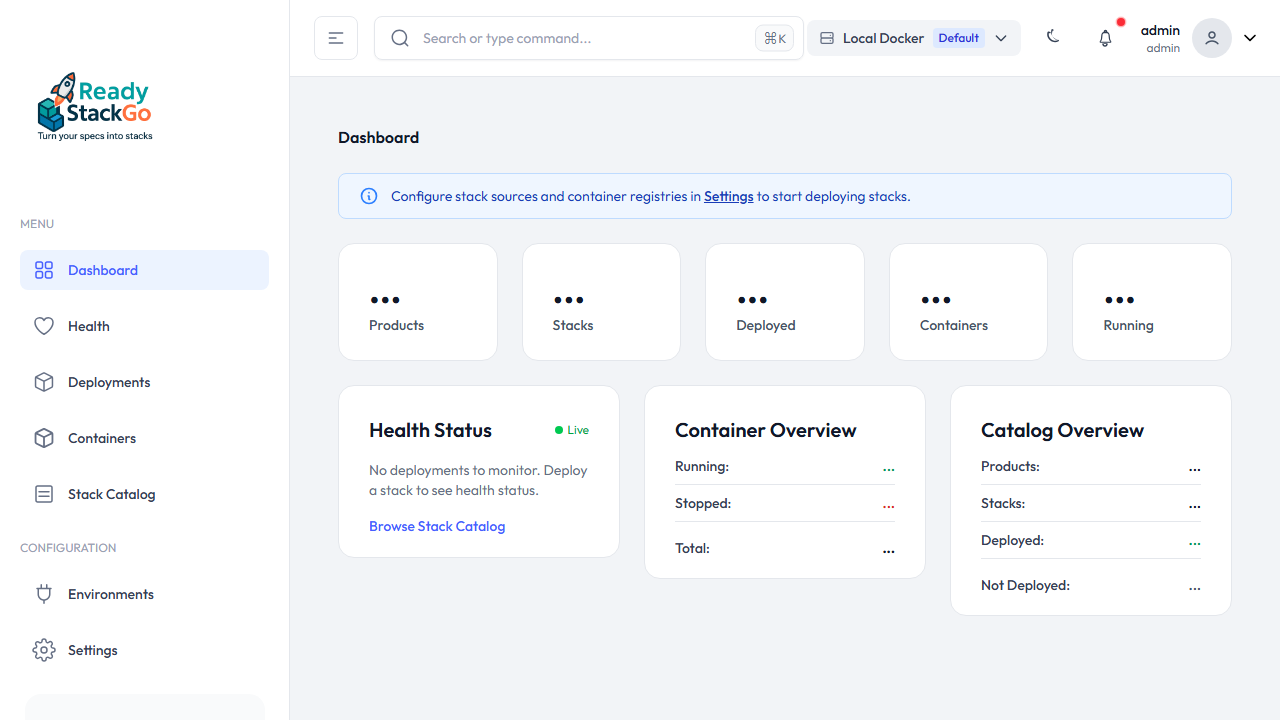
If you skipped optional steps during onboarding (environment or stack sources), the dashboard shows a hint with recommendations for further configuration. This hint disappears automatically once all items are configured.
Next Steps
Section titled “Next Steps”- Add Environment (if skipped) — Go to Environments and create a new environment
- Configure Stack Sources (if skipped) — Under Settings → Stack Sources
- Deploy First Stack — See First Deployment
Troubleshooting
Section titled “Troubleshooting”Wizard Does Not Start
Section titled “Wizard Does Not Start”If the wizard does not start automatically:
# Check container logsdocker logs readystackgo
# Restart the containerdocker restart readystackgo
Reset the Wizard
Section titled “Reset the Wizard”If you want to run the wizard again, you need to reset all data:
# Stop container and delete volumesdocker compose down -v
# Start container againdocker compose up -d